
Guide
Tech Tuesdays – Installing Ecler Acoustic Panels
01/09/2021

As you may have seen in some of our previous Tech Tuesday content, our Ecler Acoustic panels are the perfect accompaniment to video conferencing and modern teaching environments, alongside other spaces.
Tailored specifically for the speech frequency band, and therefore improving speech intelligibility within a room, these simple panels can significantly improve communication in any space.
Whilst the installation of these panels is incredibly straight forward, we have a few tips and tricks to ensure that your panels both perform to their optimum as well as looking professional.
The various range of panels are all made from the same material, known as LEA, or a Lightweight Ecological Absorbent, which is very similar to a microfibre. Even the patterned side of the panel on which you see the design is built from this same material, just this time it is printed and condensed. Bearing this in mind, you have to treat the panel with care when it comes to installation as to not damage the surface.
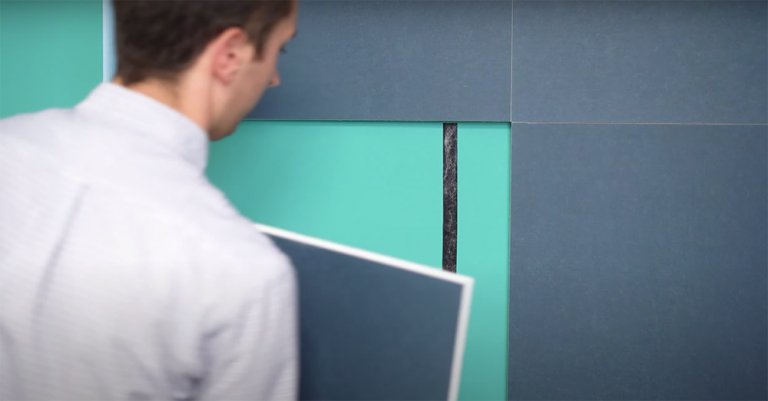
Tip 1 – Combining multiple panels
The first tip may be the most obvious, but when lining panels up to each other on either the vertical or horizontal access, apply a fair amount of pressure against the fixed panel before fixing the panel to the securing Velcro strips. This way, once you place the panel, you are ensuring minimal gap is visible and therefore less pulling is needed from the adjoining strips, leading us on to tip 2!
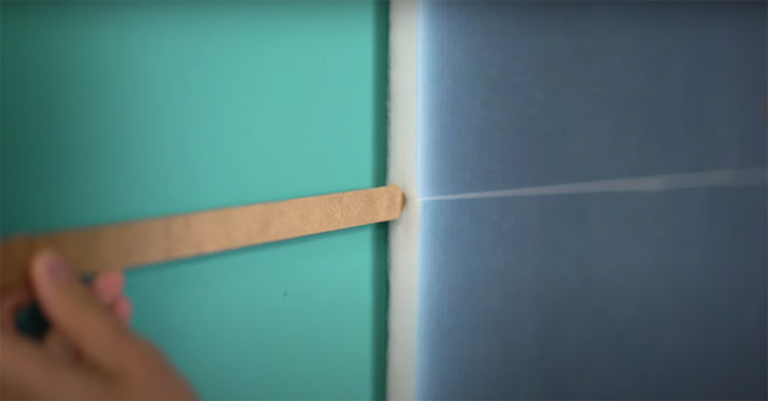
Tip 2 – Adjoining wooden strips
The wooden strips supplied with the panels are used to both increase the strength of the panel structure and also tighten the tolerance between panels, so that minimal gap is visible. The wooden strips slide through pre-cut grooves in the microfibre panels making install very easily. With these strips, we’d recommend you cut a 45 degree angle off of both sides of the tip to create a point. This point helps the strip to glide through the groove of the panel and avoids the bunching up of the microfibres, securing a better fit of the panels and keeping the strip consistent through the groove.
Tip 3 – Cutting the panels
No two surfaces within a space are the same, and sometimes, panels may need to be cut to fit or to avoid electrical sockets or conduits. Not to worry, these panels are cuttable, but some care needs to be taken to get a good finish. For the first step, you want to mark up the panel to ensure that you’ll get a straight edge with your cut. As the old adage goes, measure twice, cut once! You then want to score the panel lightly with a Stanley knife, making the journey of the knife as easy as possible, and finally, extend the blade out far enough so that you can cut the panel in one clean attempt. It is important to do this in as fewer cuts as possible to keep a clean edge to the panel.
Finally, for any of your acoustic requirements, don’t forget to get in touch with either myself of the team! We have a bunch of resources available to be able to predict the number of acoustic panels required in your space, as well as the ability to customise the panels with your own branding.
